
Where Does Coolant Go in a Car and How Do You Add It Correctly in 7 Steps?
You add coolant into the clear plastic reservoir under your car’s hood, usually marked with “coolant” or a radiator icon. This reservoir is where the engine coolant goes to help keep your car from overheating.
First, always check the level when the engine is cold, so you get an accurate reading between the “Min” and “Max” marks.
Slowly open the cap using a cloth to protect your hand, and add the correct type of coolant gradually up to the “Max” line.
It’s important to bleed any trapped air from the system to avoid problems later on.
Once you’re done, secure the cap tightly and check for any leaks around the reservoir.
Keep following along to discover the full step-by-step process for a safe and efficient coolant fill. This way, you’ll make sure your car runs smoothly and stays cool no matter the weather.
Key Takeaways
- Coolant is stored in a clear plastic reservoir under the hood, often marked with “coolant” or a radiator icon. It’s pretty easy to spot once you pop the hood.
- Always check the coolant level when the engine is cold. Make sure it stays between the “Min” and “Max” marks on the reservoir.
- Before you open the coolant cap, wait at least 30 minutes after turning off the engine. Use a cloth or glove to protect your hand—this helps prevent burns or injury from any pressure that might release.
- When adding coolant, pour the recommended type slowly using a funnel. Stop once you reach the “Max” level.
- Don’t forget to tighten the reservoir cap securely after filling. This keeps everything sealed tight.
- After you’re done, take a moment to check for leaks. If needed, bleed any air from the system.
- Finally, make sure the cap seals properly to keep the cooling system pressurized and working well.
Where to Find Coolant in Your Car

Although locating coolant in your car might seem tricky at first, you’ll usually find it in a clear plastic reservoir under the hood, marked with either the word “coolant” or a radiator icon. This reservoir is easy to spot in the engine bay and often has “Min” and “Max” level indicators to help you see the proper coolant amount when the engine is cold.
In some vehicles, you might also see a radiator cap directly on the radiator, where coolant levels can be checked and topped up. The coolant system includes hoses connecting the reservoir and radiator, circulating the coolant throughout the engine to keep it from overheating.
Before touching the coolant reservoir, make sure the engine is cool to avoid injury from hot coolant or pressure. Identifying the coolant reservoir carefully is essential for safe handling and proper maintenance of your vehicle’s cooling system.
How to Safely Check Your Coolant Level
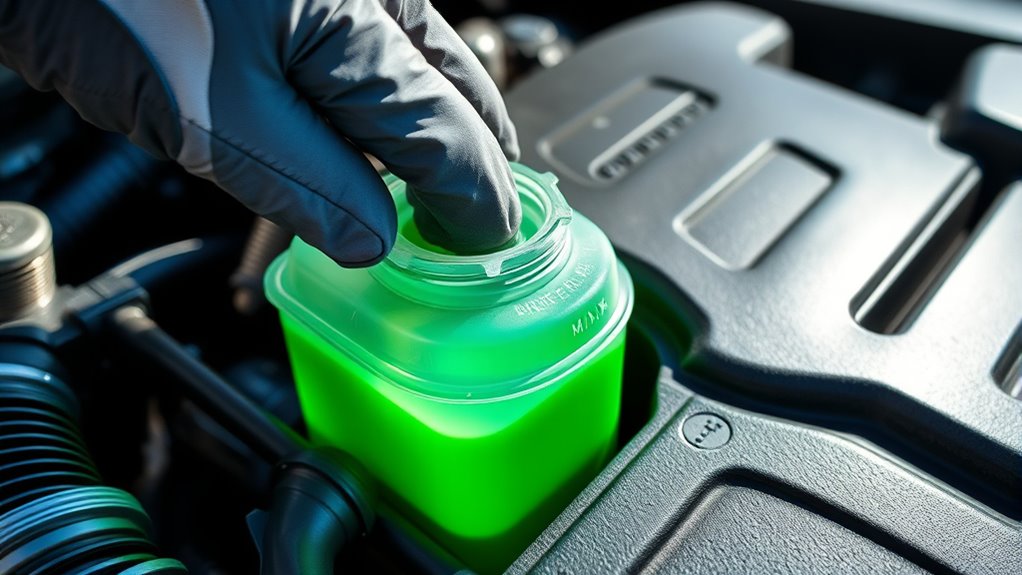
Before you check your coolant level, make sure the engine is completely cold. This helps prevent burns from hot liquid or steam.
Locate the coolant reservoir, which is usually a transparent plastic tank marked with ‘Min’ and ‘Max’ lines. You want to visually check the level to make sure it’s between these marks.
Find the transparent coolant reservoir marked with ‘Min’ and ‘Max’ lines to check the fluid level visually.
When the engine is cold, the coolant should be near the ‘Max’ line—not overfilled or below the ‘Min’ mark. Use a clean cloth or glove to carefully open the reservoir cap, especially if the engine has been running recently. This helps you avoid injury.
If you find the coolant is low, you’ll need to top it up with the correct type of coolant. And don’t forget to securely replace the reservoir cap afterward to maintain proper pressure and avoid leaks.
How to Open the Coolant Reservoir or Radiator Cap

When you need to open the coolant reservoir or radiator cap, always make sure the engine is completely cold. This helps you avoid burns from hot, pressurized coolant.
Park your vehicle on level ground and wait at least 30 minutes after turning off the engine to confirm it’s cooled down. Never try to open the radiator cap when the engine is hot. Steam and hot coolant can cause severe injury.
To open the coolant reservoir or radiator cap safely, use a cloth or glove to protect your hand. Turn the cap slowly counterclockwise until you hear a click or feel it release pressure.
This gradual loosening lets any residual pressure escape safely before you fully remove the cap. Taking these precautions helps you avoid accidents and keeps you safe while checking or adding coolant to your vehicle.
Choosing the Right Coolant for Your Vehicle
Choosing the right coolant means understanding the types available and how they work with your vehicle. You’ll want to check compatibility carefully, especially before mixing coolants, since not all types play well together.
It’s really important to follow your owner’s manual. That way, you’ll pick the best option for your engine and climate.
Coolant Types Overview
Since your vehicle’s cooling system relies heavily on the right coolant, you need to understand the different types available. Choosing the correct coolant type is vital to avoid corrosion and overheating.
The most common coolant types include:
- Inorganic Acid Technology (IAT): Usually green, lasts about 2 years.
- Organic Acid Technology (OAT): Often orange or pink, lasts up to 5 years.
- Hybrid Organic Acid Technology (HOAT): Combines IAT and OAT benefits, typically yellow or turquoise, offering extended protection.
Always check your vehicle’s owner manual to confirm the recommended coolant type and antifreeze concentration. It’s the best way to make sure you’re using the right stuff.
Using the specified coolant type guarantees your engine runs smoothly and stays protected under various conditions. So, it’s definitely worth taking a moment to get it right!
Compatibility and Mixing
How do you know which coolant suits your vehicle best? Always check your owner’s manual for the specified coolant type. This guarantees compatibility and peak engine performance.
Universal coolants offer some flexibility and can often mix safely with others. But you should still avoid mixing incompatible coolants. Doing so risks sludge, corrosion, and poor cooling.
| Coolant Type | Compatibility Tips |
|---|---|
| Manufacturer Specified | Best for *maximum* performance |
| Universal Coolants | Can mix with most types safely |
| Different Colors | Color doesn’t *assure* compatibility |
How to Add Coolant Without Overfilling
When should you check and add coolant to avoid overfilling? You should always check the coolant level when the engine is cold. This helps make sure you get an accurate reading and prevents overfilling, which can cause pressure issues.
When adding coolant, go slowly and stop once the level reaches the ‘Max’ line on the reservoir. It’s better to add a little at a time than to pour it all in at once.
To add coolant without overfilling, make sure to:
- Use a clean funnel to pour the coolant carefully and avoid spills.
- Fill gradually, checking the level frequently to stay within the recommended range.
- Securely tighten the reservoir cap after filling to prevent leaks and maintain pressure.
Taking your time with this will save you from headaches down the road!
How to Bleed Air From Your Coolant System
Although you might not notice it right away, air trapped in your coolant system can cause overheating and reduce efficiency. To get that air out, start by warming up your engine and finding the bleed screw on the radiator or engine.
Air trapped in your coolant system can cause overheating—warm your engine and locate the bleed screw to release it.
Open the bleed screw slowly while the engine is running. Keep the coolant reservoir cap off during this time so the trapped air can escape. Watch for a steady flow of coolant coming out.
Set your heater to maximum to help circulate the coolant and push the air toward the bleed screw. Once you see a continuous stream of coolant without any bubbles, tighten the bleed screw to stop leaks.
Finally, top off the coolant reservoir up to the ‘Max’ line to keep everything properly filled. Bleeding air from your coolant system helps your engine stay cool and run smoothly.
How to Secure the Coolant Cap and Check for Leaks
Make certain you tighten the coolant cap firmly by turning it clockwise until it clicks or feels secure. Before securing, check the rubber seal for any cracks to guarantee it seals properly.
Once tightened, inspect around the cap for leaks to catch any issues early. It’s a quick step that can save you from bigger problems later on.
Proper Cap Tightening
How do you guarantee your coolant cap stays secure and leak-free? Proper cap tightening is key.
First, align the cap properly and turn it clockwise until it clicks or resists further turning. This ensures a tight seal without over-tightening.
Before securing, check the rubber gasket is intact and seated correctly to prevent leaks. Use a cloth for extra grip if the cap is hard to turn, but don’t force it.
To maintain proper cap tightening:
- Inspect the gasket regularly for wear or damage
- Avoid over-tightening to protect the threads
- Periodically check the cap’s tightness during routine maintenance
Following these steps will help keep your coolant system sealed and running smoothly.
Inspecting For Coolant Leaks
When you finish checking or refilling your coolant, always secure the cap tightly to prevent leaks and maintain system pressure.
For effective coolant leak detection, inspect the area around the coolant cap for stains, residue, or wetness. These signs could mean there’s a loose or damaged seal.
Check the cap itself for any visible cracks or damage. If you find any defects, replace the cap to keep a proper seal.
After securing the cap, take a good look at nearby hoses and connections. Look out for any seepage or leaks there too.
It’s also a good idea to periodically test the coolant cap’s pressure release function. This helps verify it holds the right system pressure and prevents leaks.
These simple steps help you catch leaks early and keep your cooling system running smoothly.
Ensuring Seal Integrity
After inspecting for leaks around the coolant cap and hoses, the next step is to confirm the cap seals properly. You want to make certain the cap tightens securely and clicks into place, creating a strong seal to prevent coolant loss.
Before closing, wipe the cap and surrounding area with a cloth to keep dirt out and maintain a clean seal. After securing the cap, inspect the area again for any signs of leaks or loose fittings.
To ensure seal integrity:
- Tighten the coolant cap firmly until it clicks.
- Regularly check the cap and seals during maintenance.
- Look for any cracks or wear that might compromise the seal.
Following these steps keeps your coolant system sealed and running efficiently. It’s a simple way to avoid bigger problems down the road.
Frequently Asked Questions
What Is the Correct Way to Add Coolant to a Car?
You add coolant by first ensuring the engine’s cold, then carefully opening the reservoir cap. Fill it with the correct coolant mix up to the Max line.
Make sure to tighten the cap securely after filling. Then, run the engine briefly to let the coolant circulate properly.
What Not to Do When Adding Coolant?
You wouldn’t want to hasten troubles by opening a hot radiator cap or mixing incompatible coolants.
Don’t overfill, ignore leaks, or substitute water—these missteps quietly invite corrosion and pressure problems you’d rather avoid.
Can I Just Add Coolant to Existing Coolant?
Yes, you can add coolant to existing coolant if they’re compatible. Always use the same type already in your system, and avoid mixing different types to prevent reactions.
Check your manual to be sure before topping off. It’s better to be safe than sorry when it comes to your car’s cooling system!
Do I Need to Drive After Adding Coolant?
Yes, you should drive briefly after adding coolant. This helps circulate the fluid and releases any trapped air.
It also guarantees proper filling. After driving, be sure to check the levels and look for leaks. This way, you can confirm everything’s sealed and working correctly.
Conclusion
If you skip adding coolant or mess it up, your engine could overheat faster than a rocket launch—total disaster! But follow these simple steps, and you’ll keep your car running cool like a pro.
Don’t let a tiny coolant check turn into a massive, wallet-busting repair. You’ve got the power to protect your engine and avoid breakdown drama.
So grab that coolant, take charge, and keep your ride chill no matter what! Adding coolant correctly is key to preventing engine overheating and costly damage. By knowing where coolant goes in your car and following the right steps, you ensure your vehicle stays in top shape. Regular coolant checks and proper refills not only extend engine life but also improve performance. Stay proactive, keep your cooling system healthy, and enjoy worry-free drives every time you hit the road!





One Comment