
Best Way to Replace a Car Emblem in 10 Easy Steps
To replace your car emblem, start by gathering essential tools like adhesive remover and plastic trim tools. These will make the process smoother and help protect your car’s surface from scratches.
Cleaning and heating the old badge area is key—it softens the adhesive so you can remove the emblem without damage.
Next, carefully loosen and remove the old emblem using floss or plastic tools. Take your time here to avoid scratching your paint.
Once the old badge is off, pick a flat, aligned spot for your new emblem. Mark the spot to ensure accuracy before pressing the badge firmly in place.
Peel off the protective film gently, and wipe away any smudges to give your car a polished look.
Keep following these steps, and you’ll guarantee a seamless, professional installation every time. It’s easier than you might think!
Key Takeaways
- Soften old adhesive with heat, then use adhesive remover and dental floss to gently detach the old emblem without damaging the paint.
- Clean and prepare the surface thoroughly, removing all adhesive residue and marking the exact placement with masking tape for alignment.
- Align the new badge carefully using marked guides, pressing firmly and evenly from center outward for at least 30 seconds.
- Remove protective films slowly after initial pressing, ensuring the badge remains straight and securely attached without lifting.
- Finish by wiping fingerprints and smudges with a microfiber cloth. Avoid repositioning to maintain strong adhesion and a professional look.
Get Your Tools Ready for Badge Removal and Application
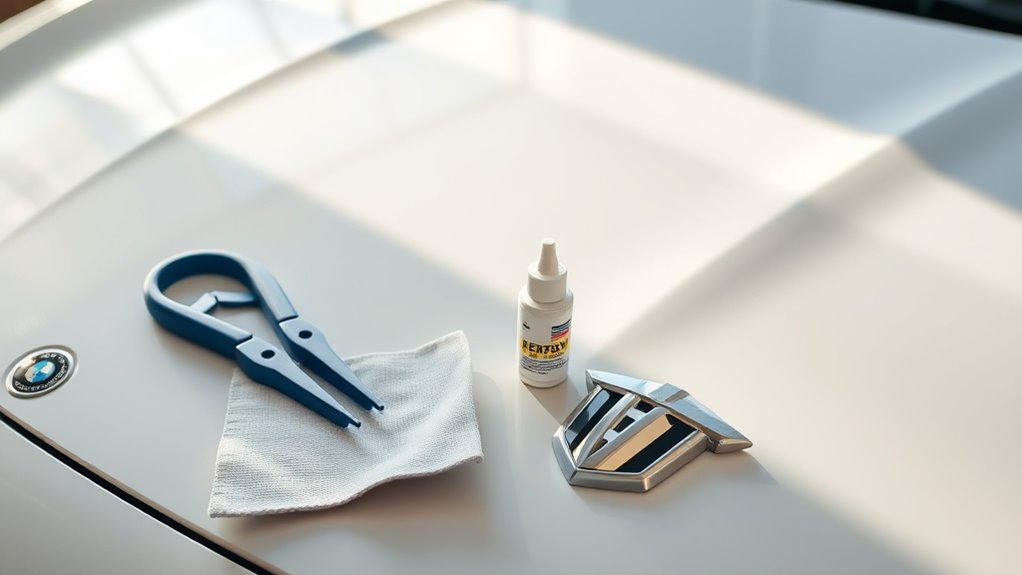
Before you start removing your car emblem, gather all the necessary tools to make the process smooth and damage-free. Make sure you have automotive adhesive remover, like Goo Gone, in a spray bottle to safely loosen the badge’s adhesive.
Keep in mind, using a plastic trim removal kit with flat-edged tools helps pry off the emblem without scratching your paint. You’ll also want dental floss to gently slide behind the badge, which detaches it carefully and prevents surface damage.
Once the badge is off, make sure you have microfiber and terry cloths ready to clean any leftover adhesive. This will ensure a smooth and clean surface for the new emblem.
Also, preparing the new badge with its adhesive backing and alignment tools beforehand will save you time and hassle during application. Having all these tools at hand sets you up for a clean and efficient badge replacement experience.
Understand the Badge Replacement Process at a Glance

When you replace a car emblem, you’ll start by carefully removing the old badge using adhesive remover, plastic tools, and dental floss to protect your paint. Once the old emblem is off, it’s crucial to clean the surface thoroughly to get rid of any leftover adhesive and dirt.
This step guarantees the new badge will stick properly and look smooth. Next, position the new emblem close to the original or your desired spot to maintain a balanced, cohesive appearance.
Press the badge firmly and evenly to secure it in place, preventing it from loosening over time. Finally, peel off the protective plastic film from the new badge, revealing a clean, professional finish with no sticky residue.
Clean and Heat the Badge Area for Easy Removal
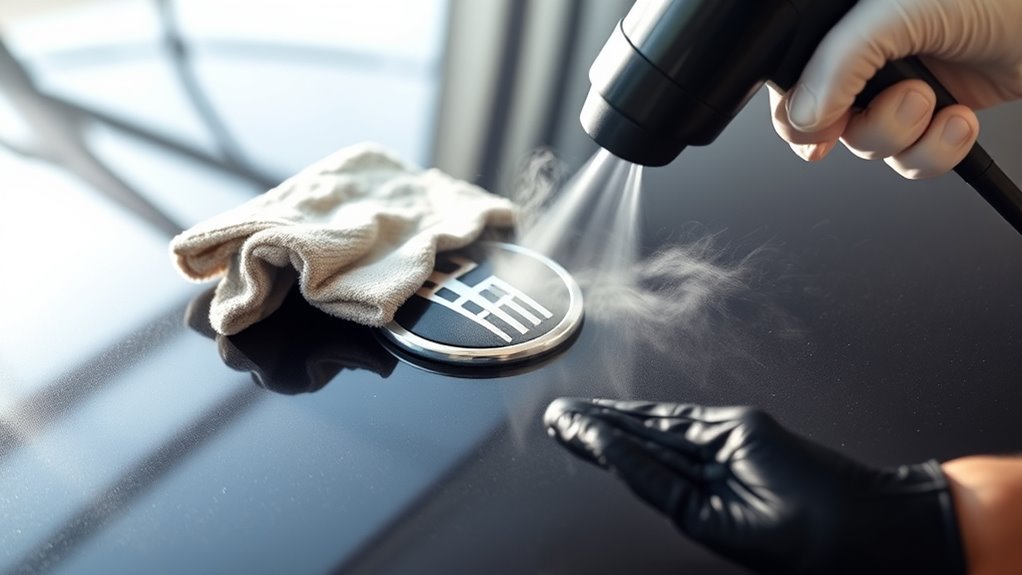
Although it might seem simple, cleaning the badge area thoroughly with soap and water is essential to remove dirt and debris. This helps heat transfer more effectively during removal.
Once cleaned, use a heat gun or hairdryer to warm the badge for 30-60 seconds at a time. This softens the adhesive, making it easier to remove without harming your car’s paint.
Here’s a quick guide:
| Step | Tip |
|---|---|
| Clean | Use soap, water, and a microfiber cloth |
| Heat | Apply heat for 30-60 seconds, avoid overheating |
| Pry | Use a plastic scraper or dental floss gently |
| Wipe | Remove leftover adhesive with microfiber cloth |
Heating the badge area correctly prevents damage and loosens the adhesive efficiently. After heating, gently pry off the badge, then wipe the surface clean to prep for the next steps.
Loosen the Old Badge With Adhesive Remover
Since the adhesive can be stubborn, spraying automotive adhesive remover generously over the badge and surrounding area helps soften it for easier removal. Make sure to cover the entire emblem and the paint around it thoroughly.
Let the remover sit for about three minutes to break down the adhesive bond effectively. This waiting period is essential—it loosens the glue without harming your car’s finish.
After letting it soak, you’ll notice the badge is less firmly attached, but don’t rush to pull it off just yet. The softened adhesive will make the next steps smoother and reduce the risk of paint damage.
Avoid using metal tools at this stage since they can scratch the surface. Instead, prepare to gently work around the edges once the adhesive has softened. This careful approach ensures a cleaner removal and prepares the surface for the next steps in replacing your car emblem.
Remove the Badge Safely Using Plastic Tools and Floss
To remove the badge safely, start by using a plastic trim removal tool to gently pry around its edges. Apply steady pressure to avoid damaging your car’s paint.
Once the edges lift slightly, use dental floss to carefully slide behind the badge in a sawing motion. This technique helps detach the emblem without scratching the surface.
Follow these steps:
- Spray adhesive remover liberally on the badge and wait about 3 minutes to loosen the glue.
- Use the plastic trim removal tool to gently pry around the badge’s edges with even pressure.
- Slide dental floss behind the badge, moving it back and forth to separate it from the surface.
- Remove the badge slowly and patiently to prevent paint damage or leftover adhesive.
Clean off All Residual Adhesive From the Surface
After removing the emblem, you’ll need to tackle any leftover adhesive to guarantee a smooth surface for the new badge. Spray automotive adhesive remover liberally onto the area and let it sit for about 3 minutes to soften the glue.
Use a microfiber or terry cloth to gently wipe away the residue, avoiding harsh pressure that could damage the paint. If some adhesive sticks stubbornly, just reapply the remover and carefully scrape with a plastic trim tool or cloth.
Keep inspecting and repeating until the surface is completely clean. Finish by wiping down the spot with a damp microfiber cloth to remove any solvent traces.
| Feeling Frustrated? | Take a Deep Breath |
|---|---|
| Sticky residue lingers | Patience clears it away |
| Worried about scratches | Gentle touch protects |
| Ready for the new look | Clean surface, fresh start |
Pick the Best Spot for Your New Badge Placement
You’ll want to choose a spot that keeps your new badge visually balanced with any existing logos or design lines. Look for flat, clean areas and use nearby features like tail lights to help guide placement.
Avoid curved or uneven surfaces to guarantee the badge sticks properly and looks sharp. It’s all about making sure your badge not only stays put but also looks great.
Optimal Badge Positioning
When selecting the perfect spot for your new car emblem, aligning it with existing logos creates a balanced and polished look. To position your badge optimally, follow these key steps:
First, match the height and location of the new badge with existing logos to maintain balance. Also, consider your vehicle’s design lines and contours; the badge should complement, not clash with, these features.
Next, use masking or painter’s tape to mark the spot before sticking the badge. This helps ensure precise placement.
Finally, keep the badge near the original location or in a symmetrical area. Doing this maintains visual harmony and proper proportion relative to the vehicle’s rear.
Visual Balance Considerations
Although placing your new emblem slightly off from the original spot can add a personalized touch, you’ll want to keep it balanced with the vehicle’s overall design. Aligning the badge with key elements like the tail light or rear reflector helps maintain visual symmetry.
Use masking tape and a ruler to measure and mark the ideal spot, ensuring the emblem is straight and consistent. Pay close attention to the car’s lines and contours—the badge should complement, not clash with, these shapes.
Avoid positioning the emblem too high or too low, as this can throw off the vehicle’s harmony and draw unwanted attention. By thoughtfully considering these visual balance factors, you’ll achieve a polished and cohesive look for your new badge placement.
Align and Press the New Badge Firmly in Place
Before pressing the new badge firmly in place, make sure it’s perfectly aligned with the existing logo or the spot you’ve chosen. Proper alignment ensures your emblem looks professional and stays secure.
Ensure your new badge is perfectly aligned before pressing for a professional, secure finish.
Follow these steps to press the badge correctly:
- Position the badge carefully and double-check its alignment before applying pressure.
- Use your fingers or a soft tool to press evenly across the badge, starting from the center and moving outward.
- Apply firm, consistent pressure for at least 30 seconds to activate the adhesive fully.
- Keep an eye on the badge’s position as you press, ensuring it doesn’t shift.
Once you press the badge firmly, avoid lifting or repositioning it. Doing so can cause misalignment or weaken the adhesive bond.
Taking these careful steps will help your new emblem stay secure and look great.
Peel Protective Film and Finish the Installation
After pressing the badge firmly, you’ll want to peel back the protective film covering its adhesive surface. Do this carefully to avoid lifting or shifting the emblem. Use even, gentle pressure when removing the plastic film from the edges.
This step exposes the sticky surface fully, making sure the badge stays securely attached. Once the film is off, check that the badge is aligned correctly and firmly stuck. Press again if needed to remove any air bubbles.
Finally, wipe away fingerprints or smudges for a clean, polished look. A little attention here goes a long way!
| Step | Tip |
|---|---|
| Peel protective film | Do it slowly to avoid shifting |
| Press firmly | Apply even pressure |
| Clean final surface | Use a microfiber cloth |
Following these steps guarantees a professional finish and long-lasting adhesion for your new car emblem.
Maintain Your Vehicle’s Paint and Badge Appearance
When you maintain your vehicle’s paint and badge appearance, you protect both the car’s value and its aesthetic appeal. Taking care during badge replacement guarantees the paint stays flawless and the emblem looks sharp.
Here’s how to keep everything in top shape:
- Use an automotive adhesive remover and plastic tools to safely remove or replace badges without scratching the paint. This helps avoid any accidental damage to your car’s finish.
- Clean the surface thoroughly before applying the new badge to remove dirt and residue. This step preserves a smooth finish and makes sure the badge sticks properly.
- Apply gentle, even pressure when installing the badge to secure it firmly without damaging the paint. You don’t want to press too hard or too lightly.
- Peel the backing of the new badge carefully to avoid air bubbles or debris. Then finish by wiping the area with a microfiber cloth for a polished look.
Following these steps helps your car maintain its pristine appearance and resale value. It’s a simple way to keep your vehicle looking sharp and well cared for.
Frequently Asked Questions
How to Replace Emblems on Car?
You’ll spray adhesive remover, wait, then use plastic tools and floss to lift the emblem carefully.
Clean the area, peel the new emblem’s backing, position it accurately, and press firmly to secure it without damaging your paint.
It’s pretty straightforward once you get the hang of it! Just take your time and be gentle with the paint.
What Should I Use to Reattach a Car Emblem?
You should use automotive-grade double-sided adhesive or emblem-specific adhesive tape to reattach your car emblem.
First, clean the surface really well. Then, apply the adhesive evenly. Press the emblem firmly onto the surface and hold it in place for a strong, lasting bond.
This way, your emblem will stay put and look great!
How Long Does Plasti Dip Last on Emblems?
Plasti Dip lasts about 3 to 5 years on emblems. Think of it like a sunscreen—you’ll need reapplications if exposed to harsh sun or weather.
Proper coats and care keep it looking fresh and protected longer. So, a little upkeep goes a long way!
Is It Easy to Remove Car Emblems?
Yes, you’ll find removing car emblems fairly easy if you use plastic tools or dental floss and an adhesive remover.
Just be patient and gentle to avoid scratching your paint or damaging the clear coat during removal.
Taking your time really helps, and using the right tools makes all the difference.
Conclusion
Replacing your car emblem is like planting a seed in a garden. With the right tools and care, you gently clear the soil, remove the old, and position the new emblem just right.
Press it firmly, peel the protective layer, and watch it bloom with pride on your vehicle. Just as a gardener tends to their plants, keep your badge and paint looking fresh.
By following these simple steps, you can replace your car emblem easily and effectively. Maintaining your car emblem not only enhances your vehicle’s appearance but also protects the paint underneath. With proper care, your car will always wear its symbol beautifully, showing off your pride on the road.





5 Comments