
How Do You Lift a Truck in 5 Easy Steps?
To lift your truck safely and effectively, start by securely jacking it up on a flat surface. Use quality jack stands to support the vehicle and ensure stability. This is key to preventing accidents and making the process smooth.
Next, carefully remove suspension parts like shocks and springs. Keep everything organized as you go along to avoid confusion later. It helps to lay out the parts in the order you remove them.
Then, install your lift kit components and spacers in the correct order. Make sure each piece fits snugly and is properly seated to avoid issues down the road. Taking your time here pays off.
After that, torque all bolts to the manufacturer’s specifications and adjust your alignment properly. This step is crucial for safety and performance.
Finally, double-check your work thoroughly. Take a cautious test drive to guarantee stability and smooth handling. Keep going to uncover all the essential details for a smooth lift.
Key Takeaways
– Safely lift and secure the truck using a hydraulic jack and jack stands on a flat, stable surface.
Make sure everything feels solid before moving on.
– Remove suspension components like shocks and springs carefully, noting their orientation for reassembly.
This step is important so you can put everything back just right.
– Install lift kit parts and spacers in the correct order, ensuring secure fit and proper height adjustment.
Take your time here to get the height exactly how you want it.
– Torque all bolts to manufacturer specifications and perform a professional wheel alignment.
This helps keep your truck safe and driving smooth.
– Conduct final checks on all components and complete a cautious test drive to confirm stability and performance.
Pay attention to how the truck feels before calling it a day.
Lift and Secure Your Truck
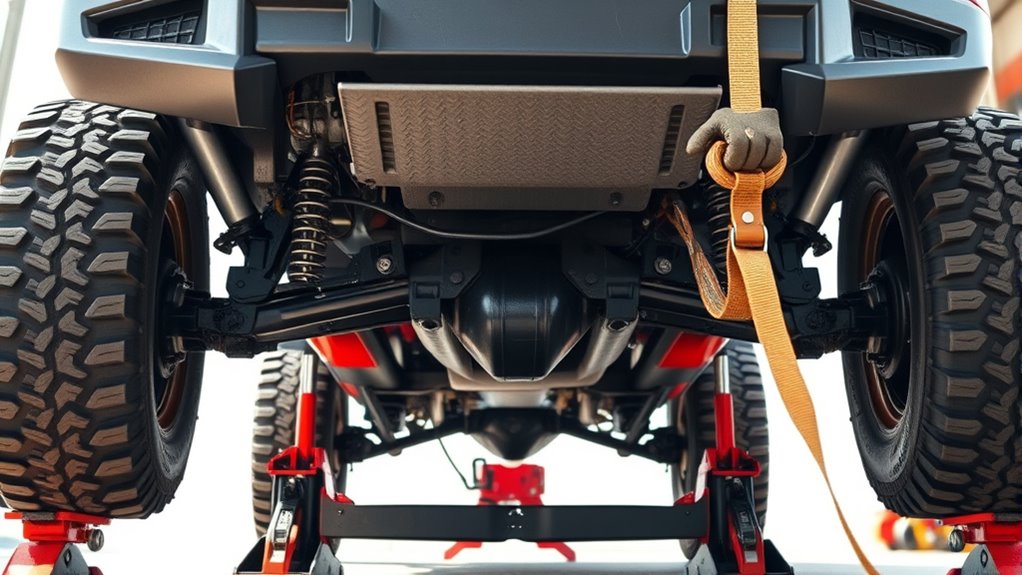
Before you begin any suspension work, lift and secure your truck using a hydraulic jack and jack stands to guarantee safety. Start by parking your truck on a flat, stable surface to prevent shifting.
Position the hydraulic jack under a solid frame point and slowly lift the truck until the wheels are off the ground. Once elevated, place jack stands firmly under the frame to support the truck’s weight securely. Never rely solely on the hydraulic jack for support.
This setup allows you to work safely on the suspension when installing your lift kit. Properly lifting and securing your truck assures you can access suspension components without risk.
Remove Suspension Components

Once your truck is securely lifted and supported, you can begin removing the suspension components. Start by using wrenches and sockets to loosen bolts on parts like shocks, control arms, and especially the leaf springs.
Take care to note the orientation and mounting points of components such as sway bars or tie rods for accurate reassembly later. If your truck uses coil springs, use spring compressors to safely compress them before removal, preventing injury or damage.
Always note component orientation and use spring compressors to safely remove coil springs without injury.
Focus on loosening all hardware methodically, making sure the vehicle remains stable throughout. Remember, safety is key—never rush this step.
By carefully detaching the leaf springs and other suspension parts, you’ll prepare your truck for the next phase of the lift process. Avoid removing any components you’re unsure about or that require special tools beyond basic hand tools.
Keep everything organized so reinstalling goes smoothly after your lift kit is installed.
Install Lift Kit Components and Spacers
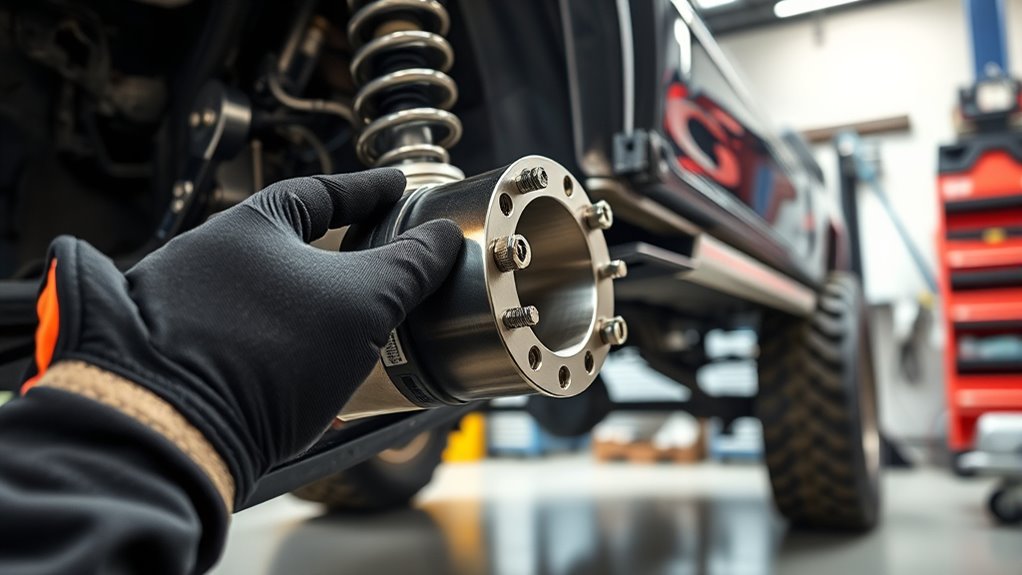
Although installing lift kit components can seem complex, following the correct sequence will make the process straightforward. Start by installing the pitman arm, then move on to the track bar and leaf springs to maintain proper alignment and suspension function.
When replacing leaf springs, loosen the shackle bolts and set the suspension under load before tightening to the manufacturer’s torque specs. Lift spacers are mounted on top of your existing struts or shocks, and you can adjust the height of the spacer to achieve your desired lift.
Make certain to handle each component carefully to avoid misalignment or damage during installation. This method ensures your suspension upgrades fit securely and perform reliably.
Torque Lift Kit Bolts and Adjust Alignment
To guarantee your lifted truck performs safely and smoothly, you need to torque all lift kit bolts to the manufacturer’s specified values using a torque wrench. For example, U-bolts on a Ford F-250 require tightening to 185 ft-lb. Using a torque wrench ensures each bolt is tightened uniformly, preserving suspension integrity and safety.
After torquing, you must adjust your truck’s alignment. Check and correct camber, caster, and toe angles to avoid uneven tire wear and steering problems. A professional wheel alignment after lifting restores proper tracking and extends suspension and tire life.
Always follow the lift kit manufacturer’s torque specifications and alignment instructions for your specific vehicle. Proper torque and alignment are vital steps that protect your truck’s performance and handling after a lift.
Double-Check Everything and Take a Test Drive
After torquing all bolts and adjusting your truck’s alignment, you need to double-check every component to make certain nothing is loose or out of place. Carefully inspect all bolts, nuts, suspension, and steering parts, confirming they meet manufacturer specifications. Make sure everything is aligned correctly to avoid uneven tire wear and maintain safe handling.
Once you’re confident all parts are secure, take your truck for a slow, cautious test drive. Pay close attention to any unusual noises, vibrations, or changes in steering response.
Notice the vehicle’s height and stability, ensuring the lift feels solid and balanced. This initial test drive helps you identify any issues that might need further adjustment before you hit the road regularly.
Frequently Asked Questions
What Is the Easiest Way to Lift a Truck?
The easiest way to lift your truck is by installing a leveling kit. You’ll bolt on spacers or springs, raising the front by a couple inches without complex work.
It’s pretty straightforward. Just use basic tools and follow safety steps, and you’re good to go!
How to Lift a Truck Yourself DIY?
Sure, lifting a truck yourself is a walk in the park—if your park includes jacks, bolts, and heavy springs.
You’ll jack it up, swap suspension parts, follow instructions carefully, then double-check everything for safety.
It might sound simple, but take your time and don’t rush.
Safety first, always!
Is It Hard to Lift Your Own Truck?
It’s not too hard if you’ve got mechanical skills and patience. You’ll need the right tools, knowledge of suspension parts, and must follow safety steps carefully.
Expect some challenges, but it’s definitely doable yourself. Just take your time, and don’t rush the process. You’ll be surprised what you can accomplish!
How to Raise a Truck Without a Lift?
Raising a truck without a lift feels like defying gravity! You’ll use a hydraulic jack and jack stands to get started. Then, remove the wheels to access the suspension parts.
Next, swap out the suspension parts with spacers or springs. Make sure to tighten everything with the proper torque. Don’t forget to check the alignment for safety and performance.
Conclusion
Now that you’ve lifted your truck, it’s like you’ve given it a fresh pair of wings—ready to conquer any terrain with confidence. Just remember, safety comes first: double-check every bolt and alignment before hitting the road.
A little patience and care go a long way in making sure your lift is solid and smooth. With these steps, you’ve transformed your truck into a powerful, elevated machine ready to roll!
Lifting your truck not only boosts its look but also improves off-road performance and ground clearance. By following these simple steps, you’ve ensured a safe and effective truck lift that enhances both style and capability. Enjoy your newly lifted truck and the adventures it will take you on!




One Comment